Tuesday, December 20, 2016

Semester Reveiew

Progress Achieved

Rugger Approaches Completion


Who's This dashing Amphibian?

If you recall my earlier post about my semester project, you'll perhaps recognize the handsome gentleman pictured above. For the first time in a while, I have most nearly completed a project in the amount of time I predicted. (By most nearly I mean there is a scene I have not finished but soon It will be done and this post will be updated) When I get the finishing touches done after winter break, I will have the final product that I intend to submit to eMagine this spring!


I encountered many challenges while finishing this project, but not nearly as many as I encountered in my various 3D projects. Since, when I last left you off, I had created a movie file to help me time my frames, most of the work since then has been drawing the frames and organizing them into workable layers (no need to re-render a background when you can just have the characters move, similar to older 2D levels of animation).


Additionally, I had to make a few sacrifices to the intended product to make the animation more possible. For example, I no longer have Rugger gesture for his drink in the second scene, due to time restrictions. Also, the no longer has freckles on his shoulders, to eliminate possible headaches in the second scene as he pulls himself up on the counter. Shading, as well, has been scrapped so that I can get something view-able rendered in time. It's a bit more than I wanted to sacrifice, but I came into this project simply wanting to get something done, and I did that! I am quite proud of myself for getting this far, and no longer have to wonder if I'll have nothing to show for my years of eComm.


You ready? Take a look below to see for yourself what this final project looks like!


Monday, December 19, 2016

Let's Look At:


Motion Capture Article Review

Acting or Animation?


avatar_sagar


As I was browsing the articles on Animation Arena, I came across a topic that caught my eye: motion capture. More and more movies nowadays are using motion capture to help animate digital characters. From the blue aliens in Avatar to Smaug in The Hobbit, an increased number of characters are made to move to the faces and bodies of the actors that voice them. One side effect of this, however, seems to be the question on whether the main work in on that of the actor or the animator.


Image result for motion capture
The article didn't give a definite answer to this, due to the general lack of one, but it seems that it cannot be defined as either. Without the actor, the character doesn't have the same nuanced performance. Without the animator, the movie would be limited to the special effects incorporated into live action. Motion capture is likely in pinnacle of the symbiosis of acting and animation that exists today.

Beyond it's intense monetary and time-saving benefits, I feel that Motion capture as a medium will only grow in use as the computers we use only increase in computing speed and power to handle what it can offer.

What do you think?

Sunday, December 18, 2016

Let's Look At:


Collegiate Animation


What School Is Right for Me Or You?


Today's blog is going to focus on a subject that is becoming more and more relevant to myself and many of my classmates as our final year of high school comes to a close: college choice. I have found one article on Animation Arena that helps address this topic.


Image result for university of central florida


There are so many colleges in this country that the task of finding the one that best fits you can be a daunting task. For those looking into careers in animation, there are key components that make the search a little quicker. As the linked article claims, there are four main things that students can look for in a school:

1. Does the program teach all aspects of animation? 


Whether it's a specialty art school or a program within a state school, the author of the article, Annie Gray, stresses the importance of having a generalized idea of the entire process of animation. From basic drawing skills to art history, she strongly advocates for all animation students to learn these skills and all others. What's more, she finds it common for most animation programs to not even teach animation the first year, not for gen-eds, but for classes like perspective and figure drawing.

Now, while these are good and notable points, I personally contest the need for all animators to be able to draw with exceptional skill to get into the industry. This is mostly accredited to the vast increase in computer animation. Learning all the animation principles? I find that valuable. Needing to become an expert on figure drawing? Maybe not. In my case, I'd rather have more animation and less "art history". 

2. How much experience do the professors have?


On this pint Annie Gray explains that truly good professors have not just the technical skills but the industry experience and connections that give their students a head start in the reality of the field. On this I agree strongly that it's a sure benefit to any student to have such a professor.

3. Where is it located?


Not all fields are location-sensitive, but animation definitely is. The author explains in this section that finding a school closer to the major studios (namely, in sunny, expensive, California) greatly increases your chances of getting hired as "there is a great chance that those animation studios recruit their talent from those local schools." This is not to say that to be an aspiring animator you must go to a California school. There are several good schools, as the author also explains, in Chicago or Florida that can teach just as well, but may need slightly more work on the connections end of things.

4. Is there a good alumni network?


This aspect of schools may be often overlooked, but can be invaluable to an aspiring animator. Gray writes that may college graduates in animation report finding jobs through their professors or classmates, so being able to have reliable contacts from old students who've made it into the industry.


These are four, but certainly not all the things a student should look into when selecting a school for animation. Personally, some that I use as indicators are range of majors (in case you change your mind), and student-teacher ratio (which can be good or bad depending on the class or student).

Tuesday, October 11, 2016

Senior Year First Project Hops Into Action!

Going For Gold!

One Frog, One Goal


For our senior year of high school, the scenario is very similar to that of junior year, but with greater expectations. Due to the time-consuming nature of 3D animation, this year, in order to get the the 'animating' part of animation faster, I am attempting a hand drawn animation.

The Frog

If you got past the groan-inducing pun you may have noticed in the title of this post, you may have inferred that the subject of my animation was a frog. This frog is not just any frog, however: this frog is a gun-slinging rough-and-tumble cowboy frog. Our unnamed hero is destined, in this particular animation, to enter a bar of unspecified nomenclature and order a questionably fresh glass of water. It's rather straightforward in nature, but will take considerable effort nonetheless, due to my lack of practice in the realm of 2D movement.

The natural first step to any animation is creating a storyboard. To the left is one of the first scenes from the storyboard I made for this animation, showing him entering the bar. On the right, a later one showing a pose he will take when ordering his drink. It's very important to plan out an animation as in-depth as possible to avoid having to redo parts later on in the process. It also helps plan out camera shots.

While there may not be an actual camera involved in 2D animation nowadays, it is still important to structure each scene dramatically for the greater communicated effect. Since I had not taken part in the video section of the program I am in, this has proven to be an oddly difficult thing for me to puzzle out. For example, the storyboard where he opens the door has a decent camera angle, but doesn't emphasize much about him. On the other hand:

This shot is similar, but uses the looming shadow to make him seem relatively diminutive compared to everybody else, inducing a sense of comedy at the beginning, despite a dramatic set up.
Timing is essential to comedy, so to time it out, I've taken a variety of key poses and put them together in after effects to get a feel for ho the animation will flow upon completion. Timing feels more objective than it should be, but I know that, with practice, I can become very aware of how to create a natural flow of events.


Below is one example of a times out scene. It is extremely rough, but it serves enough to give me a feel for where the frames will need to be.


My goal now is to finish all the rough scenes, then go over them with cleaner lines digitally and, if time allows, to add color to this. I find color just as important as timing in communicating mood, so optimally I will be able achieve a relatively nice-looking animation by the end of second quarter.

Wish me luck!

Thursday, May 19, 2016

Year's End Reflection

It's Been A Good Year

Let's Look Back


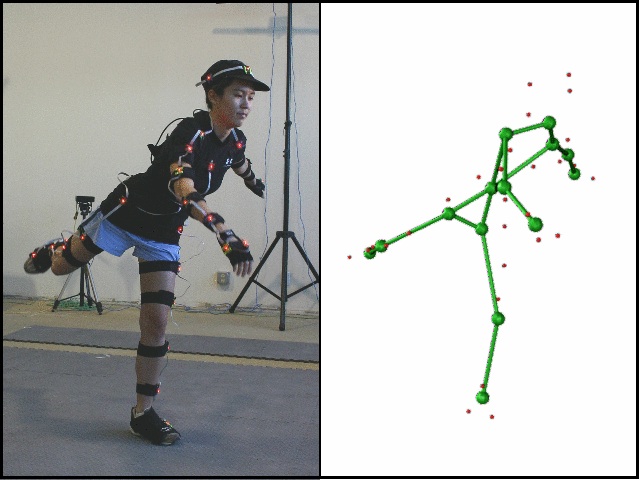
Junior year is notorious for being one of struggle and strife, but it can also be one of learning and exploration. From Petri to Ampich-Anne, I have had many chances to look into and develop many new, more complex skills than I had the chance to last year whilst focusing on design and animation. From the trials and tribulations of this bird to the new realm of stop-motion I have been able to learn many things about modeling, project planning, scope, team management, rigging, and much more.


From the very start of this year we had something to do. One project I did not post directly about was a fish. (from the concept art on the left) The goal of this project was to teach us all better modeling techniques, weight painting, and some ways to animate something. It was the springboard for all the modeling and rigging know-how I was to learn throughout the rest of the year. Only now do I truly understand how vital it was that we did this particular project at the beginning of the year.

Looking back upon this fish, I can directly see how it links to what I have been able to accomplish this year. Having to draft the fish initially taught me the advantages and necessity of having an image to go off of. I have repeated this technique with both Petri and Ampich-Anne, as seen in their respective posts Here and Here. Next, we learned vital modeling skills which I have taken to heart with every other 3D project since. We learned a little about UV texturing (probably the least developed skill of mine) and a lot about rigging (Which was then reiterated for me with, yet again, Petri). Each of these skills was learned more though trial and error than direct instruction. Nothing teaches you to plan ahead like having to redo the same steps ten times over due to a lack of forethought. Technically, I feel far more confident in modeling ad rigging than I did before. I feel familiar enough with Maya now as so that I can envision exactly how I intend to pul life out each and every pre-generated shape. (Maybe next year I should practice straying from those...)


A dramatic scene from this year's group project


Beyond those technical skills, this year has given me more vital practice in working with others. All but the stop motion project this year were my solitary ideas and solitary efforts. For me, working with those of differing skills and mindsets is a whole other ballpark of difficulty. Not to say I am introverted to the point where it hides my working: I'm not. Rather, I walk a fine line between wanting everything to go my way and wanting to sit back and watch things unfold. I generally lean towards the fist kind, however, when I have not worked with all the people involved before (and even then my trust only goes so far until I have seen them preform). I feel that this project was the most successful diplomatically for me, as I followed the mantra "If you think you can do it better than the person, you are assigning them to the wrong job". After the cooperative creative process, I was semi-burdened with the task of assigning jobs to people. Many were first picks for certain tasks like set building and model moving, but I often found it difficult to entrust some of the smaller things to others, even if it meant a mountain of extra work for myself. This is something I surely need to work on.


This industry is an industry of people, and it is nearly impossible to go into it without expecting to have to compromise and work with new people along the way. I must find and embrace my strength soon, so I can refine it and combine it with the strengths of others to make a truly skillful work. Last year was a jack of all trades, but really skillful at nothing in particular beyond concept art. That is still something I feel I excel at more than most, and I want to use the skills I have and will gain to be able to both create concepts that can be feasibly executed in these programs and to be able to execute them myself in the way I envision them.


Looking back at all I have done, I don't think I would honestly change anything. Every project messed up, every minute wasted, showed me countless ways that I could improve myself and my project workflow. I was not as productive as I could have been mid-year, but I learned from that, in hindsight, how I could manage my time better. If I had to change something, it would be watching more tutorials before diving into something new. Maybe, if I did that, I wouldn't have to redo as much.

All thing considered, I feel this has been my most beneficial year in e-Communication to date. I have had the rare chance to explore a field that I am interested in pursuing as a career this early in my life. To me, it's best to dip your foot into the ocean of possible careers as soon as possible, as to minimize time wasted pursuing something that you turn out to hate. Maybe that causes me to put too much pressure on my early decisions, but I suppose we'll see how that directs me in the future.

I hope to keep up my posts a little more this summer, but in the meantime, this will be my school-end farewell!


Thursday, May 12, 2016

Ampich-Anne: Character Modeling

Waiting, She's Waiting,

(Waiting for the frame to render...)


Meet Ampich-Anne: a friendly girl with a robot body! Well, not actually. The real concept is a bodiless alien that can inhabit machinery, but that is not too important right now! What is important is my attempt to create her! After dealing with Petri for so long, I wanted to use my rigging and modeling knowledge on something new!


I knew that rigging a mechanical character would be much easier than doing another organic model, so I wanted to keep the specs of my project smaller so I could be able to rig and model it within the rest of the mostly gone school year.


On the left I have one of my pictures of my character, but I knew I couldn't keep to it very well: The webbing would have been nearly impossible to do with my skill set and time, there were a lot of extraneous bits on the legs I knew I would leave behind, and the shoulder and thigh joints were to unrealistic. (With that arrangement she wouldn't be able to lift her arms up straight, and I had no idea how to manage the drawn hip setup) So, I went to work simplifying the design and making it smoother. Given that I drew her a little different each time, I didn't have many qualms changing the little indiscreet details for the sake of this model.


When I started, my major alterations were to the upper arms and thighs (I added a luminescent glass texture to them) and a small skirt-shaped piece that concealed the rough end of the segmented torso. I was very proud of how the body and face and hands came out, I took many, many, gratuitous screenshots of it. There was one GLARING problem, however (and no, it was not the eyes): the shoulders (again). You see, I didn't notice the problem I had mentioned earlier regarding the arm mobility until the point when I tried to move the arms. I ended up having to redo them completely and replaced the shoulder shown above with a more doughnut-shaped one.

At this point perhaps you may be wondering why I'm showing you all of this. Is it just a model? Am I going to animate it? Am I just showing off? The answer to all of these is "maybe, we'll see". but in all honesty, this project is a kind of final thesis for me, I think. It has taken all the small lessons I learned about Maya and combined them to make this (relatively) usable character. While I have not animated it, I certainly have posed it. I think My main goal with this character was honestly light practice and modeling (both in the creating and posing sense) practice. Below are a few examples of lighting (left) and posing (right) experimentation.


Coincidentally, I worked on this project around the same time that my teacher assigned us the topic of "time". Being in animation, it should be exceedingly easy to display time in a non-alarm-clock fashion. I, however, wanted to try to show time in a still image. I wanted to show her waiting. Not being in an organic body, She could feasibly wait in one area for extremely long periods of time. My idea was to take two identical images with differing textures and fuse them into each other as if they were a before and after statement.


Here is the result! I made it go from a more lush field to a sandy wasteland, signaling a deterioration of the climate, or maybe just a season change. I have her looking to the right as if she is looking towards the future, longing. If I were to fix it, I know I would increase the shadow resolution (to avoid that blocky-ness) and maybe make the grass and sand fade into each other more instead of just harshly dividing at Ampich-Anne. It contrasts a bit too much with the gradient sky.

But anyway, I thank anyone who has been sticking around and checking on my work over the last few years, heres my final, desired result of my shiny texture rendering. I hope you enjoy the intricate reactions as much as I do!


Wednesday, May 11, 2016

Good Golly, Gummies!

STOP!

In the name of stop motion!


Do you know what stop motion is? It's very likely that you have witnessed it whether you know it or not! Films such as The Boxtrolls, Coroline, and The Nightmare Before Christmas are all stop motion productions! What this means is that most if not all of what you are seeing consists of actual, tangible, 3-dimensional models that are moved minutely, frame-by-frame and taken pictures of to create a moving feature film.

It's real, and it's very, very tedious. But it is yet a passion of a small sect of the animation community. This semester our project was to incorporate stop motion into our projects! It was a group project, something I had not done since last year's E.T. clip, but I was surrounded by people I knew and somewhat trusted, and I was confident we could get something together.

The hardest part always seems to be coming to a consensus on the direction of the short. We had ideas involving clothes, living models, and most favorably, candy. The prevailing idea was a short story taking place in a kind of candy land with the stars being gummy bear villagers and a ferocious Bionicle beast. It was not meant to be long, but in hindsight we could have pulled off a longer fight scene to our benefit. After carefully crafting our edible utopia, we set the stage and delegated jobs. Sierra Draney was our intrepid photographer, Jake Combs our monster animating connoisseur, Katelyn Brule our music selector and co-set creator with Sierra and Anna Gaiche, and yours truly as the gummy moving master.

And the best part? This was our winning(ish) entry for eMagine this year! My team and I placed second for animated story!

I hope you enjoy watching it as much as my friends enjoyed eating it!


Tuesday, May 10, 2016

Petri Swallow: Revamped

The Bird Is Back

For the last time, however.


Remember Petri? That yellow bird that gave me so much grief last semester? Well, I revived him! (Mostly by popular demand of my peers, however.) I wanted to make something out of him to prove that I had not spent an entire semester working in vain. (Which it really did feel like I kind of did, in a way.) 

So, I buckled down and made my quasi-rigged bird move for the audience of expectant friends and parents. And, looking at it now, it wasn't as bad as anticipated. Surely not as good I wanted, but ok.

Here it is:


Now, I know it's short and the rigging is not smooth and he never does get his drink, but I think this particular animation is a testament to this past year of animation and my growth in dealing with some particularly horrid issues and incomprehensibly frustrating challenges along the way!

Monday, May 9, 2016

JCCC Technology Challenge

Two Hours of Work, 

Four Seconds of Animation


Hey there! 

It's been a while, I know. And it's been a while since I participated in the event I'm going to talk about, but now is better than never, isn't it? Anyway, let's get right down to it!

A few months back, I had the chance to participate in the Johnson County Community College Technology Challenge as an animator! I was admittedly quite nervous about it, since I had never participated before, and had no clue as to the criteria of the competition. I was very scared that I was going to be out of my league going, but I went nevertheless.

And oh am I glad that I did.

Until that point, I had been relatively unaware that JCCC had an animation program, let alone a rather good one. Kansas, sadly, is not a typical place you'd expect to find good areas to study in that field (But then again, here I am learning this in high school). But despite that assumption I found myself in a beautifully equipped classroom with PCs (I love them, but I hadn't learned to animate on them), tablets, and a second mac monitor. It felt like home, and the teachers that worked there were nice and very helpful, to boot.

The challenge? It was far easier than my fears of character rigging, animating a rock concert, or even having to collaboratively work on it with the people I arrived with, none of whom I knew particularly well. What was it? A logo. 

The JCCC Logo, to be precise. Our job was relatively straightforward: create and animate the JCCC Logo in Maya and create a brief animation displaying it.

This is the logo

We had two hours, and I managed to squeak out four seconds of relatively solid animation from that! (Boy, does modeling suck up time) Here are those precious four seconds:


I placed second overall for the animation category! I feel that if I had been a little less finicky with the text, and had been able to make it more straight, I could have maybe pushed into first place. But, alas, I did not. But at least I lost to a fellow e-Comm classmate!

Friday, March 11, 2016

Let's Look At:

Drawing Practice

Animation-Centered Exercices


Yesterday I was browsing some articles on Animationarena.com, and I came across something I felt the need to share with you all!

Click on the image to visit the article


In Annie Gray's Article, she covered a multitude of exercises that will train the artist to draw with animation, emotion, and dynamics in mind. Gray emphasizes the importance of seeing the details that you don't see normally. Animators need to be able to draw the small details of objects that the human mind disregards in favor of pattern and shape recognition. For example: the human face is a very detailed, complex object. It has wrinkles, creases, flyaway hairs, eyelashes, and all sorts of traits. However, people don't need all this information to understand what they see is a face.

:)

See, you can register that as a smiling face, can't you? It doesn't have eyelashes, a chin, or even a nose. But our mind knows it to be a face anyway. It's this same effect that gray defines as an issue. if you don't take the time to notice all the details, you won't be able to draw them.

I highly recommend taking a look at this article and trying out its exercises if this is a field you want to go in.

But back to my review!

I've seen some of the exercises they recommend before, and tried out one of them myself today: cafe drawing. Sitting in a classroom I observed my fellow classmates as they tested, and picked out certain people to quickly sketch before they shifted poses. Here are some of the sketches:


It was a lot harder than I expected to get a sketch down before the person moved (And to not look like I'm staring)

But just from doing that much I realized the benefits to doing as the article suggests. If you don't practice these skills of detail and movement-oriented art, you won't get good at them.

Gray clearly has a lot of experience refining and developing these kinds of skills, and the article is very well written (even if it is challenging to follow the exercises). I'm sure that I will be using these in the future, will you?

Thursday, March 10, 2016

Tutorial Time

Managing Maya

Forging Feet Fast


Today I am going to impart some of my acquired Maya knowledge with you all! While making my bird petri I found a quick and easy way to make 3D, simple feet that could be adapted for use in birds, reptiles, frogs, or anything in particular!


First off, make the leg. Or the cylinder, if you just want to practice the foot process.

Selecting the bottom faces, extrude the bottom down to the height you want your foot to be. Take the faces you want to be your toes (I removed ended in the middle of the faces to make larger toes) and extrude them all at once. You'll want to make sure 'Keep Faces Together' is deactivated and the you include as many subdivisions as you feel you need. I suggest 6 or more for longer toes.


When you have extended the toes, use the scale tool to shorten the end faces of the toes together BEFORE you exit out of the extrude tool. If you can use the tool to lower the toes to be flat with the ground, great!

However, Maya doesn't always play nice.

If you find that moving up and down sends your toes going in different directions, then here is my quick fix to help you out:

First, select the vertices of the bottom of each toe (together), but not the vertices connecting the toes to the leg (as shown at right).
Going into a side view that works best for you, use the scale tool (Scale Y) to compress all the vertices into a straight line.

After you do that, you can use the move tool and pull them all down to be level with the flat of the foot (or whatever you want them to be level with, if you are going for something different).

As you can see below, it is easy to eyeball it if you zoom in close.


Now, if you go into smooth preview (by selecting the mesh and hitting the "3" key), you can see what you have made! In some animals, there is a toe in the back. To make this toes you just repeat the previous process with the face directly in the back of the front toes. I did this with my foot, as you can see on the right.


Now, the bottom of your foot may still be circular, rectangular, or whatever shape you used. This can be an easy fix!

Taking the opposing vertices along the bottom, just use the scale tool to draw them in together. (In some cases, using soft select in this part will help render a better result in merging into the ankle).


Finally, just tweak the widths of the toes at the beginning, middle and end until you have the kind of toes you are looking for! I only tapered the ends of my toes for this example, but there is so much more you can do!


Thank you so much for taking the time to read or try this tutorial. Being my first attempt at making one, commentary is appreciated! Let me know what I could do better, or what I'm already doing well!

May The Feet Be With You