Friday, March 11, 2016

Let's Look At:

Drawing Practice

Animation-Centered Exercices


Yesterday I was browsing some articles on Animationarena.com, and I came across something I felt the need to share with you all!

Click on the image to visit the article


In Annie Gray's Article, she covered a multitude of exercises that will train the artist to draw with animation, emotion, and dynamics in mind. Gray emphasizes the importance of seeing the details that you don't see normally. Animators need to be able to draw the small details of objects that the human mind disregards in favor of pattern and shape recognition. For example: the human face is a very detailed, complex object. It has wrinkles, creases, flyaway hairs, eyelashes, and all sorts of traits. However, people don't need all this information to understand what they see is a face.

:)

See, you can register that as a smiling face, can't you? It doesn't have eyelashes, a chin, or even a nose. But our mind knows it to be a face anyway. It's this same effect that gray defines as an issue. if you don't take the time to notice all the details, you won't be able to draw them.

I highly recommend taking a look at this article and trying out its exercises if this is a field you want to go in.

But back to my review!

I've seen some of the exercises they recommend before, and tried out one of them myself today: cafe drawing. Sitting in a classroom I observed my fellow classmates as they tested, and picked out certain people to quickly sketch before they shifted poses. Here are some of the sketches:


It was a lot harder than I expected to get a sketch down before the person moved (And to not look like I'm staring)

But just from doing that much I realized the benefits to doing as the article suggests. If you don't practice these skills of detail and movement-oriented art, you won't get good at them.

Gray clearly has a lot of experience refining and developing these kinds of skills, and the article is very well written (even if it is challenging to follow the exercises). I'm sure that I will be using these in the future, will you?

Thursday, March 10, 2016

Tutorial Time

Managing Maya

Forging Feet Fast


Today I am going to impart some of my acquired Maya knowledge with you all! While making my bird petri I found a quick and easy way to make 3D, simple feet that could be adapted for use in birds, reptiles, frogs, or anything in particular!


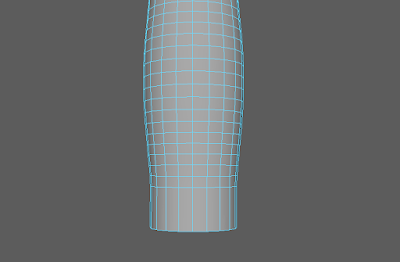
First off, make the leg. Or the cylinder, if you just want to practice the foot process.

Selecting the bottom faces, extrude the bottom down to the height you want your foot to be. Take the faces you want to be your toes (I removed ended in the middle of the faces to make larger toes) and extrude them all at once. You'll want to make sure 'Keep Faces Together' is deactivated and the you include as many subdivisions as you feel you need. I suggest 6 or more for longer toes.


When you have extended the toes, use the scale tool to shorten the end faces of the toes together BEFORE you exit out of the extrude tool. If you can use the tool to lower the toes to be flat with the ground, great!

However, Maya doesn't always play nice.

If you find that moving up and down sends your toes going in different directions, then here is my quick fix to help you out:

First, select the vertices of the bottom of each toe (together), but not the vertices connecting the toes to the leg (as shown at right).
Going into a side view that works best for you, use the scale tool (Scale Y) to compress all the vertices into a straight line.

After you do that, you can use the move tool and pull them all down to be level with the flat of the foot (or whatever you want them to be level with, if you are going for something different).

As you can see below, it is easy to eyeball it if you zoom in close.


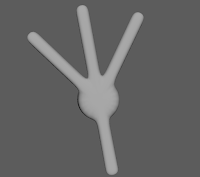
Now, if you go into smooth preview (by selecting the mesh and hitting the "3" key), you can see what you have made! In some animals, there is a toe in the back. To make this toes you just repeat the previous process with the face directly in the back of the front toes. I did this with my foot, as you can see on the right.


Now, the bottom of your foot may still be circular, rectangular, or whatever shape you used. This can be an easy fix!

Taking the opposing vertices along the bottom, just use the scale tool to draw them in together. (In some cases, using soft select in this part will help render a better result in merging into the ankle).


Finally, just tweak the widths of the toes at the beginning, middle and end until you have the kind of toes you are looking for! I only tapered the ends of my toes for this example, but there is so much more you can do!


Thank you so much for taking the time to read or try this tutorial. Being my first attempt at making one, commentary is appreciated! Let me know what I could do better, or what I'm already doing well!

May The Feet Be With You